Run (Windows)
Downloading mrtklib-quickstart
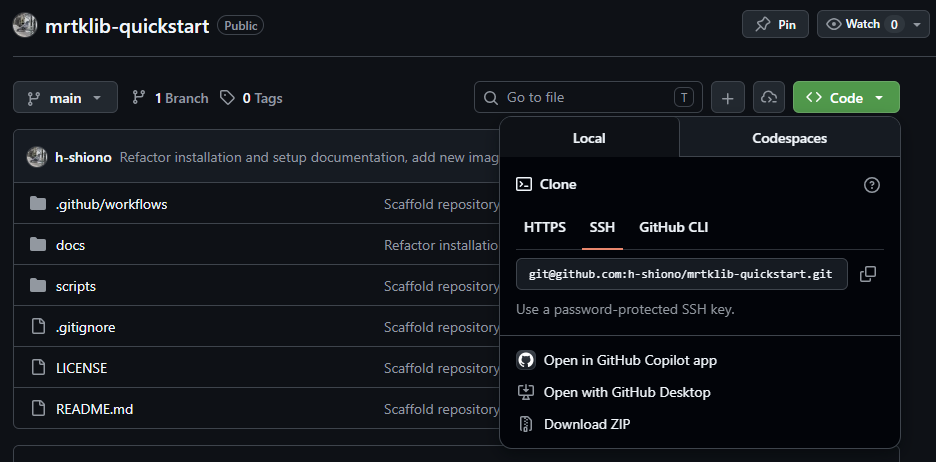
Go to https://github.com/h-shiono/mrtklib-quickstart and download mrtklib-quickstart via <> Code > Download ZIP. After downloading, extract mrtklib-quickstart-main.zip to a folder of your choice.
Note
If you have git available, cloning the repository with git clone also works.
Running MRTKLIB
Pre-run checklist
Before running, be sure to check the following.
- Connect the receiver and antenna
- Connect the receiver via USB
- Start Docker Desktop
- If the logged-in user and the administrator user are different → Run Docker Desktop as administrator
Note
To check whether Docker Desktop is running, click the ^ on the taskbar to show the hidden icons. Hover over the 🐳 icon; if it shows Docker Desktop Running, Docker Desktop is running.
Running the batch file
Double-click scripts/windows/start.bat to run it. An Open File - Security Warning dialog appears, asking The publisher could not be verified. Are you sure you want to run this software? Click Run to continue.
Note
Depending on your environment, you may instead see a Windows protected your PC screen (Microsoft Defender SmartScreen). In that case, click More info, then click the Run anyway button that appears to continue.
start.bat is a script provided by this guide. You can check its contents under scripts/windows/.
Note
The batch file performs the following steps.
- Check prerequisites: Checks whether the prerequisites for running MRTKLIB and its web UI are in place.
- Configure the receiver: Configures the mosaic-G5 to receive the QZS L6 signal and output raw measurements.
- Attach the USB: To use the USB device in the Docker container, the USB must be attached from Windows to WSL2 using usbipd, and then device-mounted (passed through) into the Docker container.
- Start the Docker container: Pulls
mrtklib-docker-uifrom Docker Hub and starts it. - Launch the web browser: Launches the web browser and displays the MRTKLIB Console.
After it runs, the same security warning appears again; click Run once more.
The screen then shows Do you want to allow this app to make changes to your device?; select Yes.
Checking prerequisites
Confirm that [OK] is displayed.
==> Starting prerequisite checks
[OK] Administrator privileges
[OK] WSL2 distribution: Ubuntu
[OK] Docker Desktop is running
[OK] Docker Desktop is using the WSL2 backend
[OK] usbipd-win 5.3.0
[OK] mosaic-G5 found at BusId 1-4
[OK] Ports 8080, 2101 are free
[OK] Prerequisite checks passed
Note
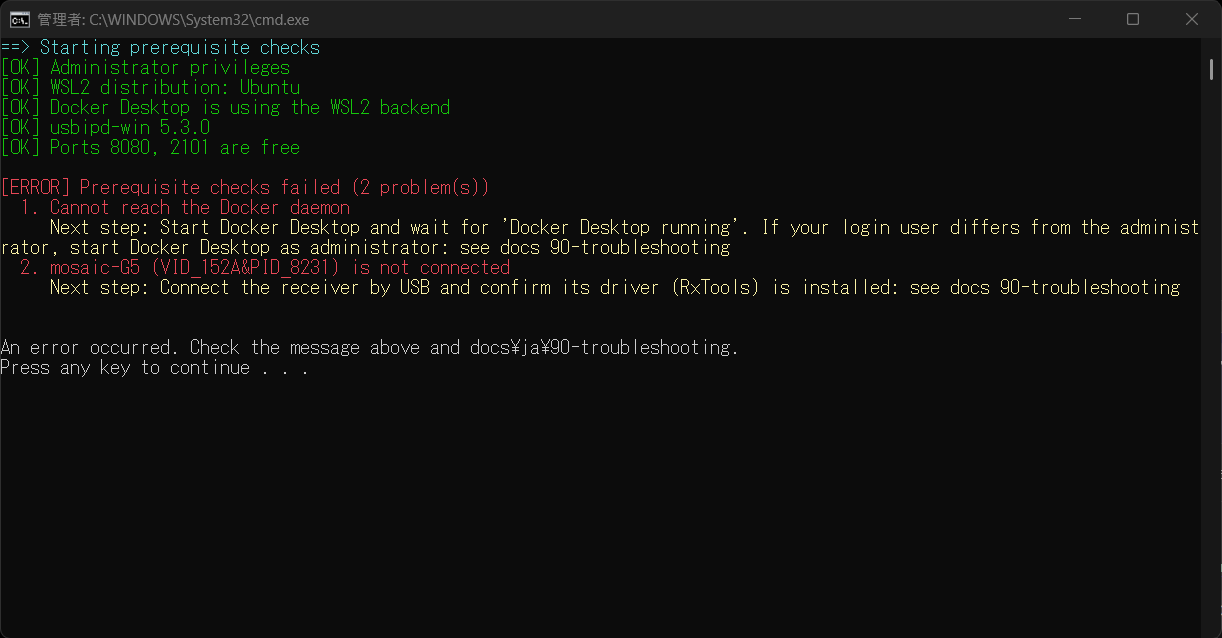
If any item does not show [OK], the missing items are listed together as shown below, and processing is interrupted. Follow the displayed Next step to resolve the issue, then run start.bat again.
Configuring the receiver
Confirm that [OK] is displayed.
==> Configuring the receiver over COM
[OK] Using receiver COM port COM9
[OK]   setSignalTracking,+QZSL6
[OK]   setSatelliteTracking,all
[OK]   setSBFOutput,Stream1,USB1,Support,sec1
[OK]   setDataInOut,USB1, ,+SBF
[OK]   exeCopyConfigFile,Current,Boot
[OK] Receiver configured and saved to boot configuration
Attaching the USB
Confirm that [OK] is displayed.
==> Attaching the USB device (mosaic-G5) to WSL
[OK] Found mosaic-G5 at BusId 1-4
==> Binding BusId 1-4 (usbipd bind)
usbipd: info: Device with busid '1-4' was already shared.
==> Attaching BusId 1-4 to WSL (usbipd attach --wsl)
usbipd: info: Using WSL distribution 'Ubuntu' to attach; the device will be available in all WSL 2 distributions.
usbipd: info: Detected networking mode 'nat'.
usbipd: info: Using IP address 172.24.80.1 to reach the host.
[OK] mosaic-G5 attached to WSL (BusId 1-4); both COM ports are now available in WSL
Starting the Docker container
Confirm that [OK] is displayed.
==> Starting the mrtklib-docker-ui container
==> Detecting the SBF serial port in WSL
  /dev/ttyACM0: 4096 bytes, SBF sync '$@' x24
  /dev/ttyACM1: 0 bytes, SBF sync '$@' x0
[OK] SBF stream detected on /dev/ttyACM0
[OK] Passing device: /dev/ttyACM0 -> /dev/ttyACM0 (as seen in the container)
Note
The receiver has two virtual COM ports, and depending on the environment, the one carrying SBF may be either ttyACM0 or ttyACM1. The batch file passes only the detected port through, always as /dev/ttyACM0 inside the container. Because of this, the path you set later in the UI is always ttyACM0.
Launching the web browser
Confirm that [OK] is displayed.
==> docker run (hatognss/mrtklib-docker-ui:0.3.0-alpha)
==> Waiting for the web UI at http://localhost:8080
[OK] Web UI is up; opening http://localhost:8080
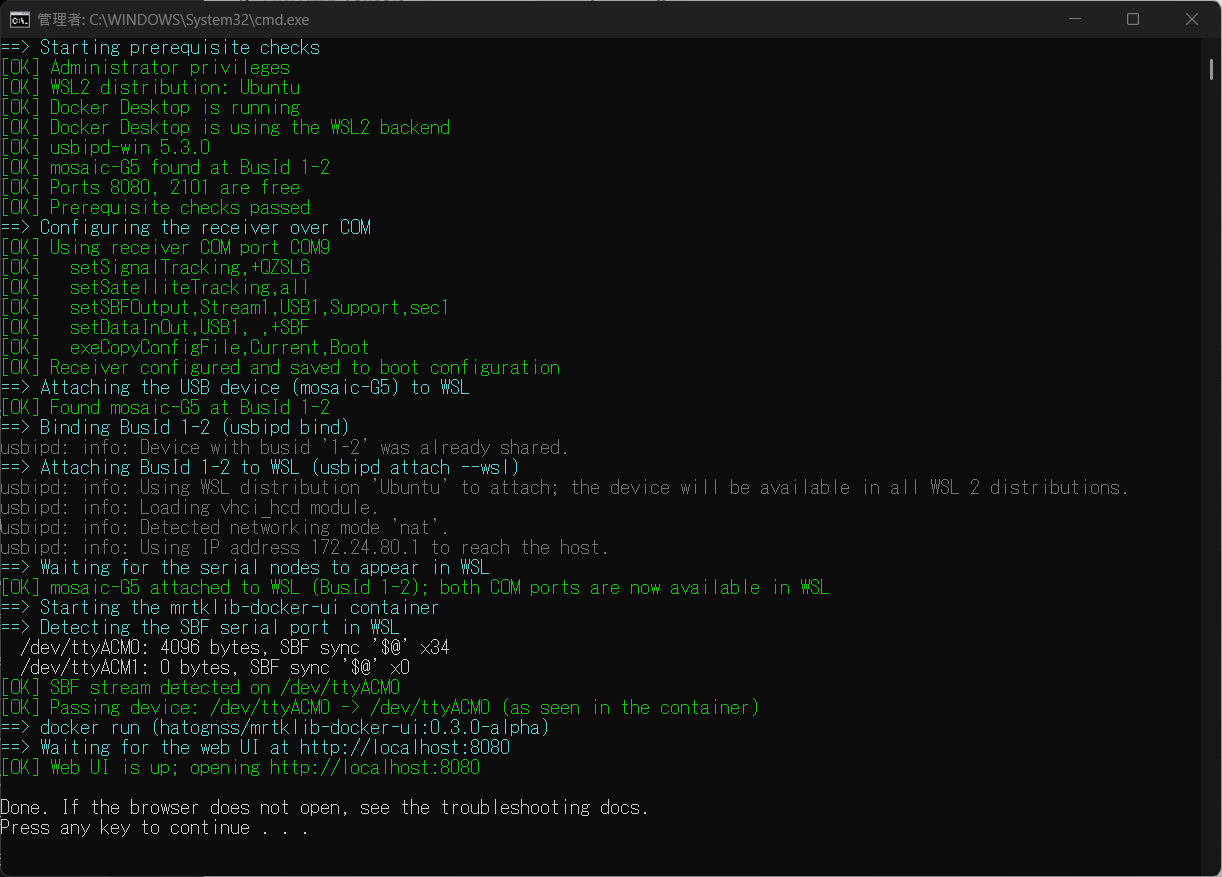 start.bat execution screen
After [OK] Web UI is up; opening http://localhost:8080 is displayed, the web browser launches and shows the MRTKLIB Console screen.
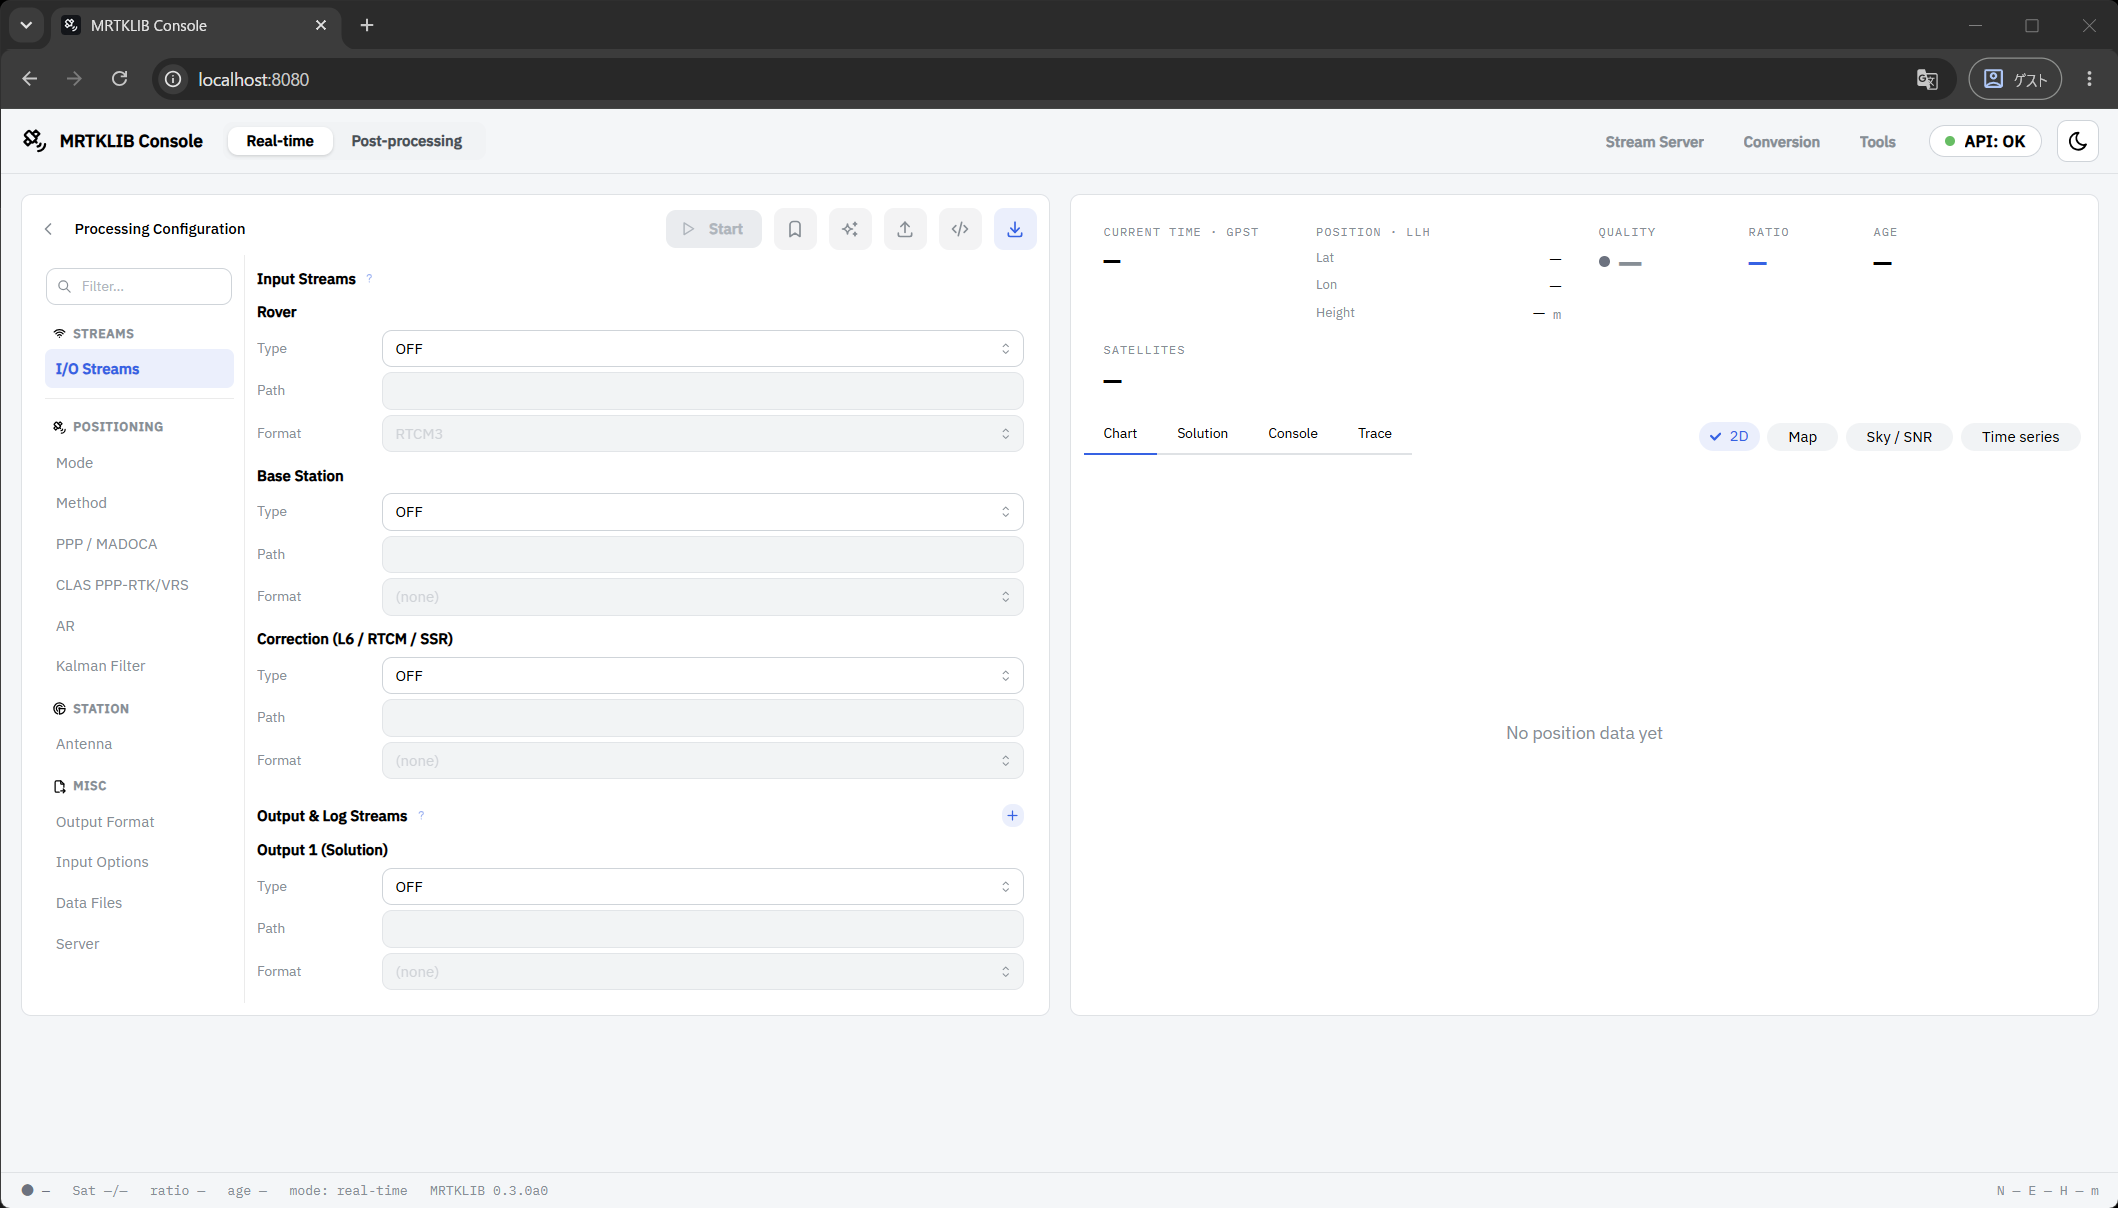
This completes starting MRTKLIB and the web UI.
Next steps
- Go to Using the UI
- If it doesn't work → Troubleshooting