Using the UI
Running real-time PPP positioning
Loading the configuration file
Click the bookmark icon to open Preset.
Load the preset labeled QZSS MADOCA (BUILT-IN). You'll be asked Load preset will overwrite current settings. Continue?, so click Load to load it.
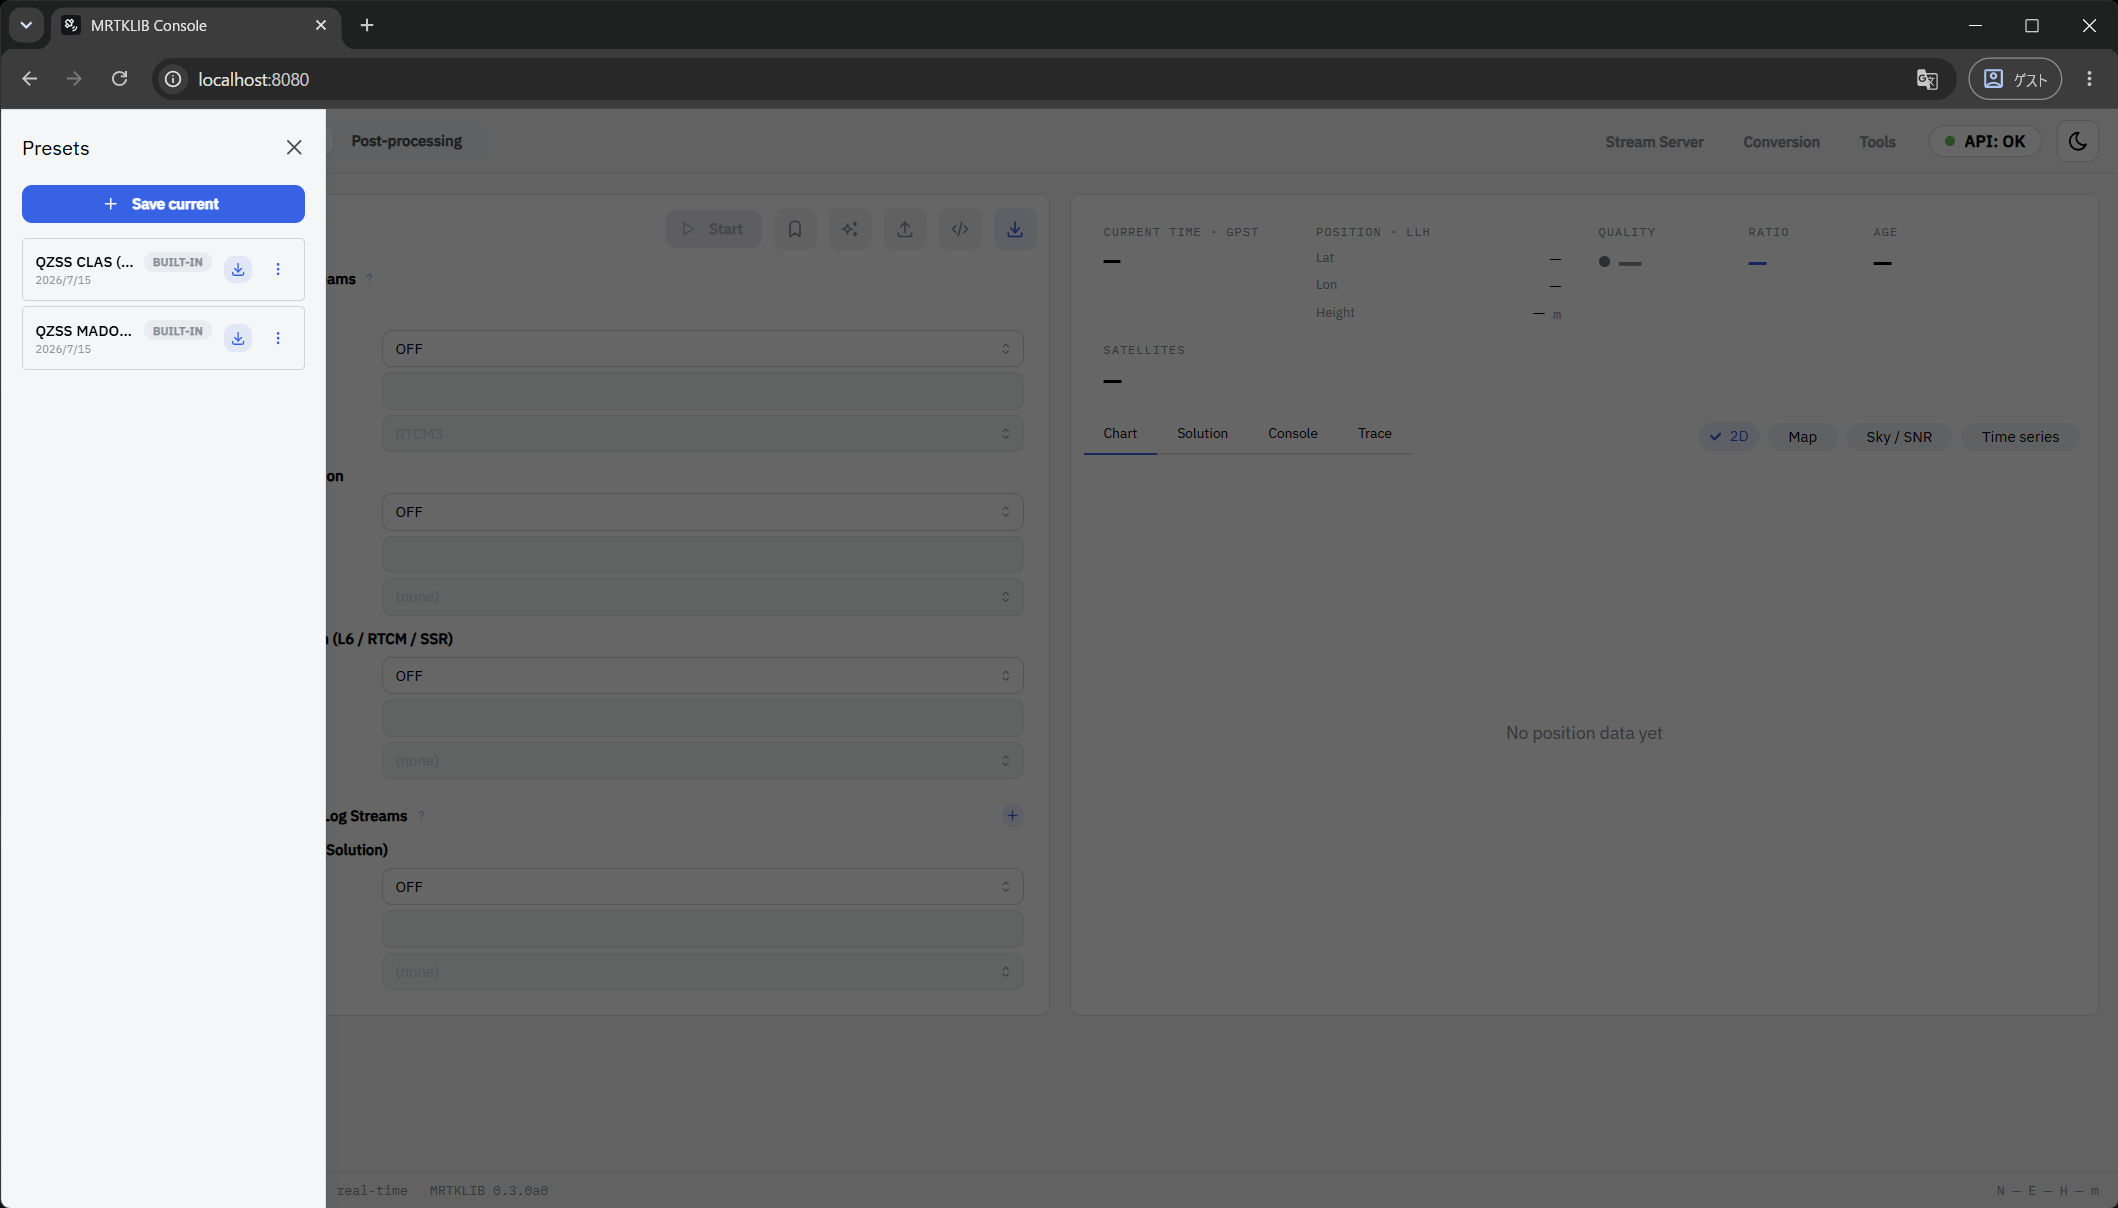
When loading succeeds, "QZSS MADOCA (PPP-Kinematic)" loaded is displayed.
Configuring the rover
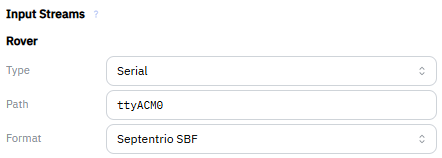
In Input Streams > Rover, set the following values.
| Item | Value |
|---|---|
| Type | Serial |
| Path | ttyACM0 |
| Format | Septentrio SBF |
Note
Path is always ttyACM0. No matter which of the receiver's virtual COM ports the SBF data comes from, the startup script passes it through so it appears as /dev/ttyACM0 inside the container, so you don't need to change it depending on your environment. The leading /dev/ is not needed.
Starting positioning
Click Start to begin positioning. On the first run, it takes a little time before positioning starts because navigation data must be acquired.
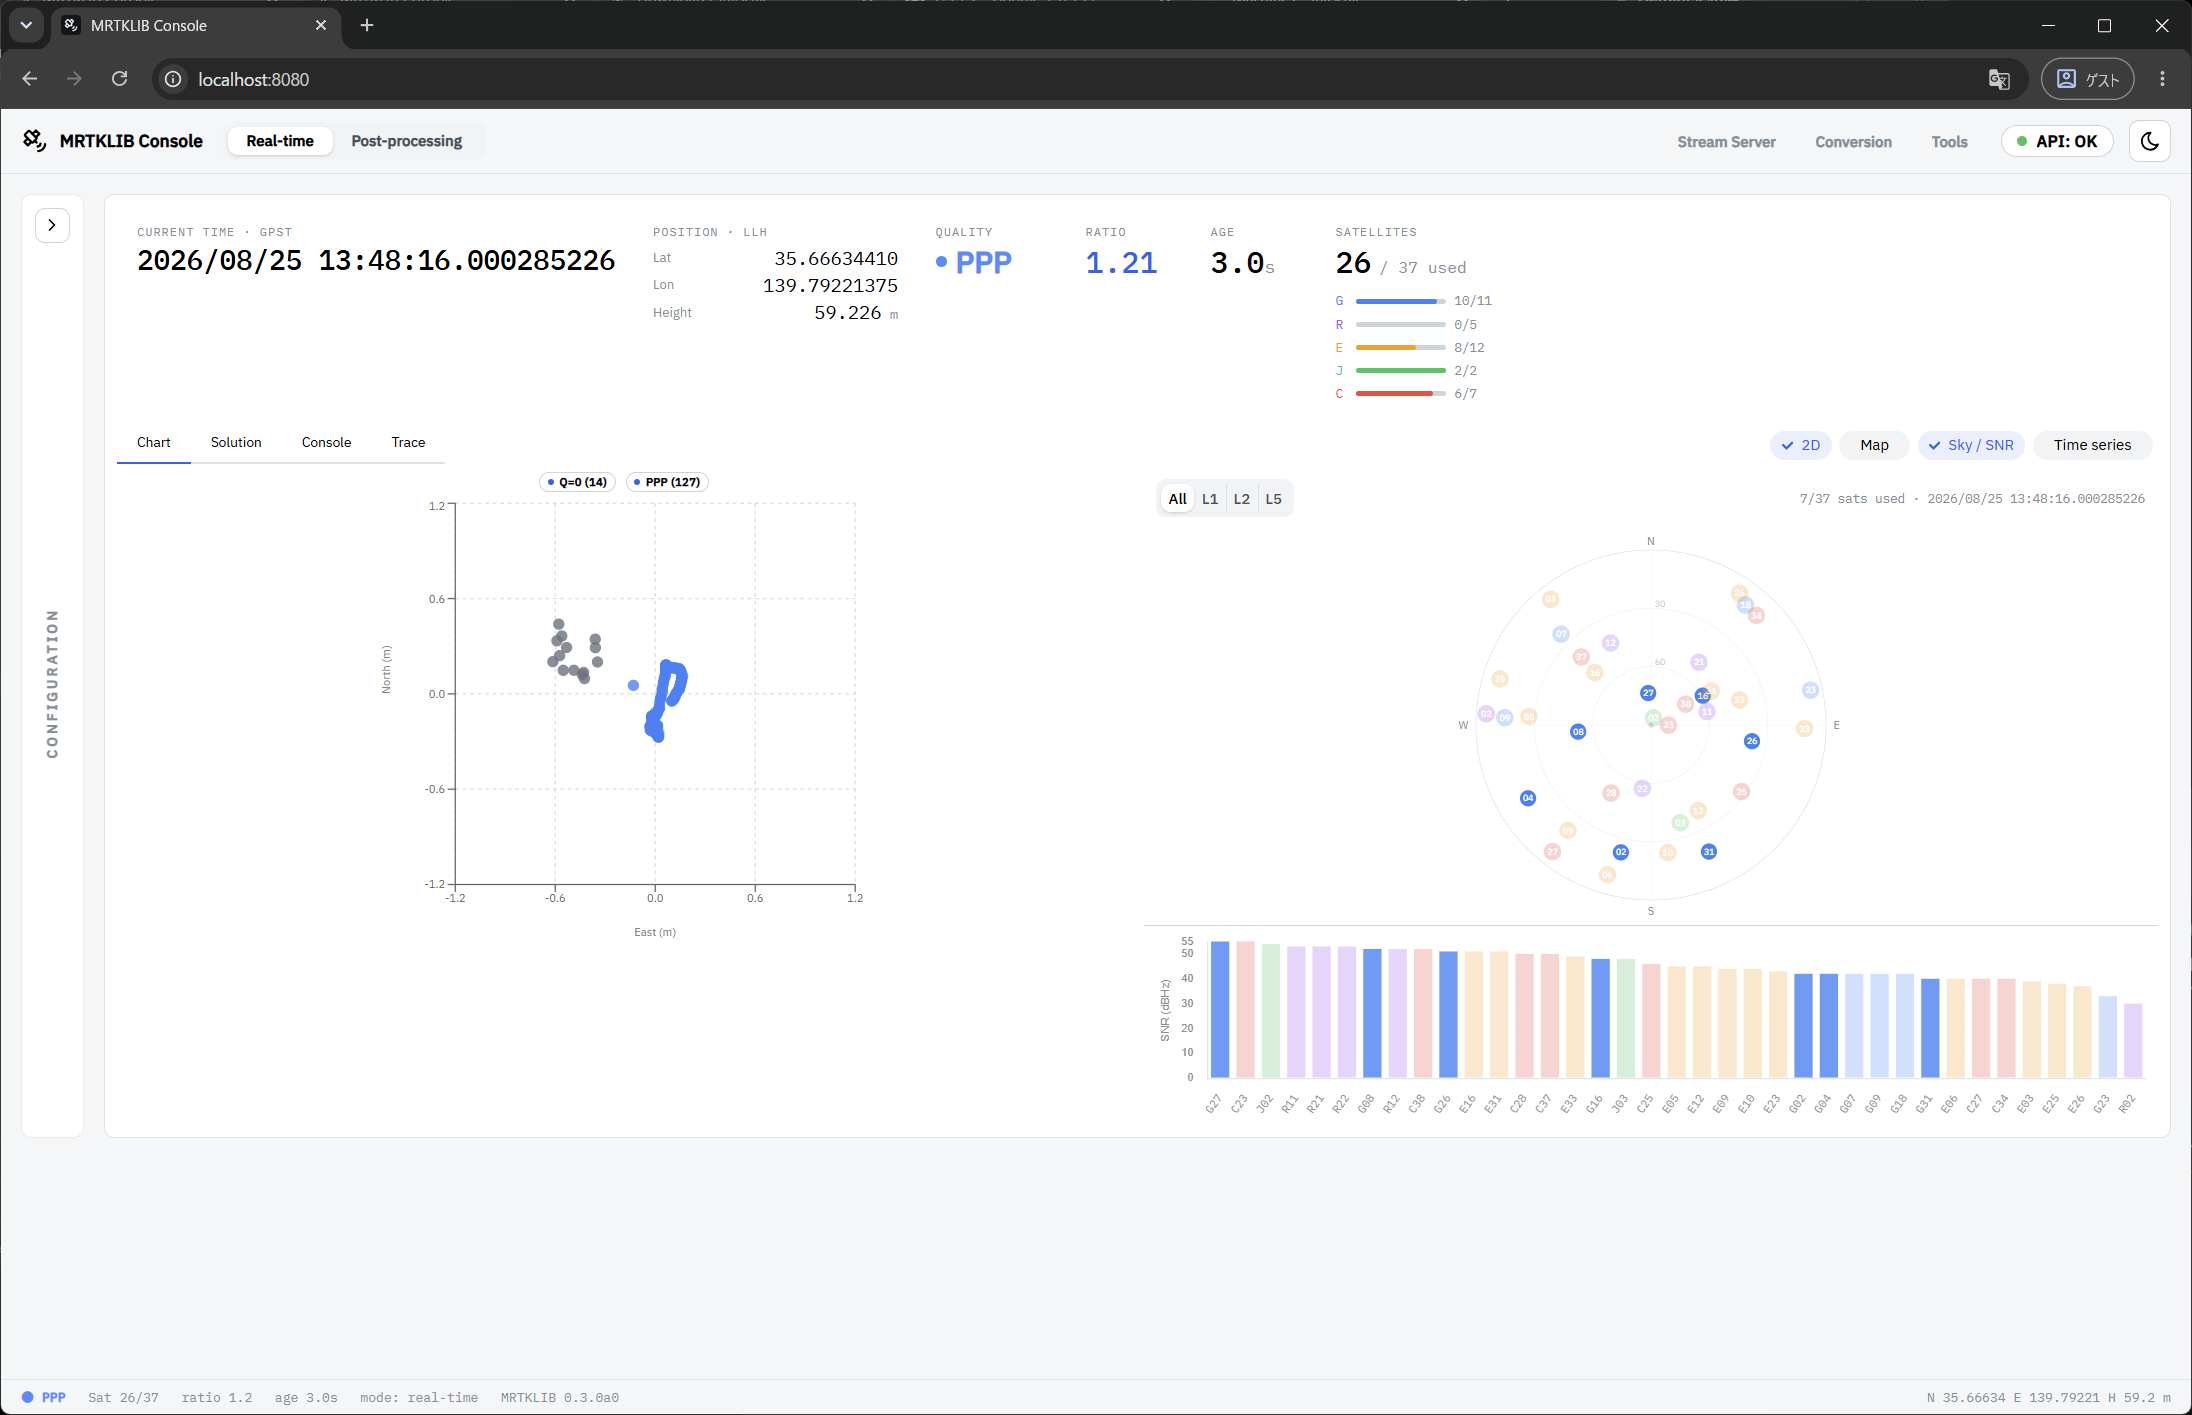
Thanks to wide-area ionospheric correction, you can get a FIX solution within a few minutes under good conditions.
Switching charts
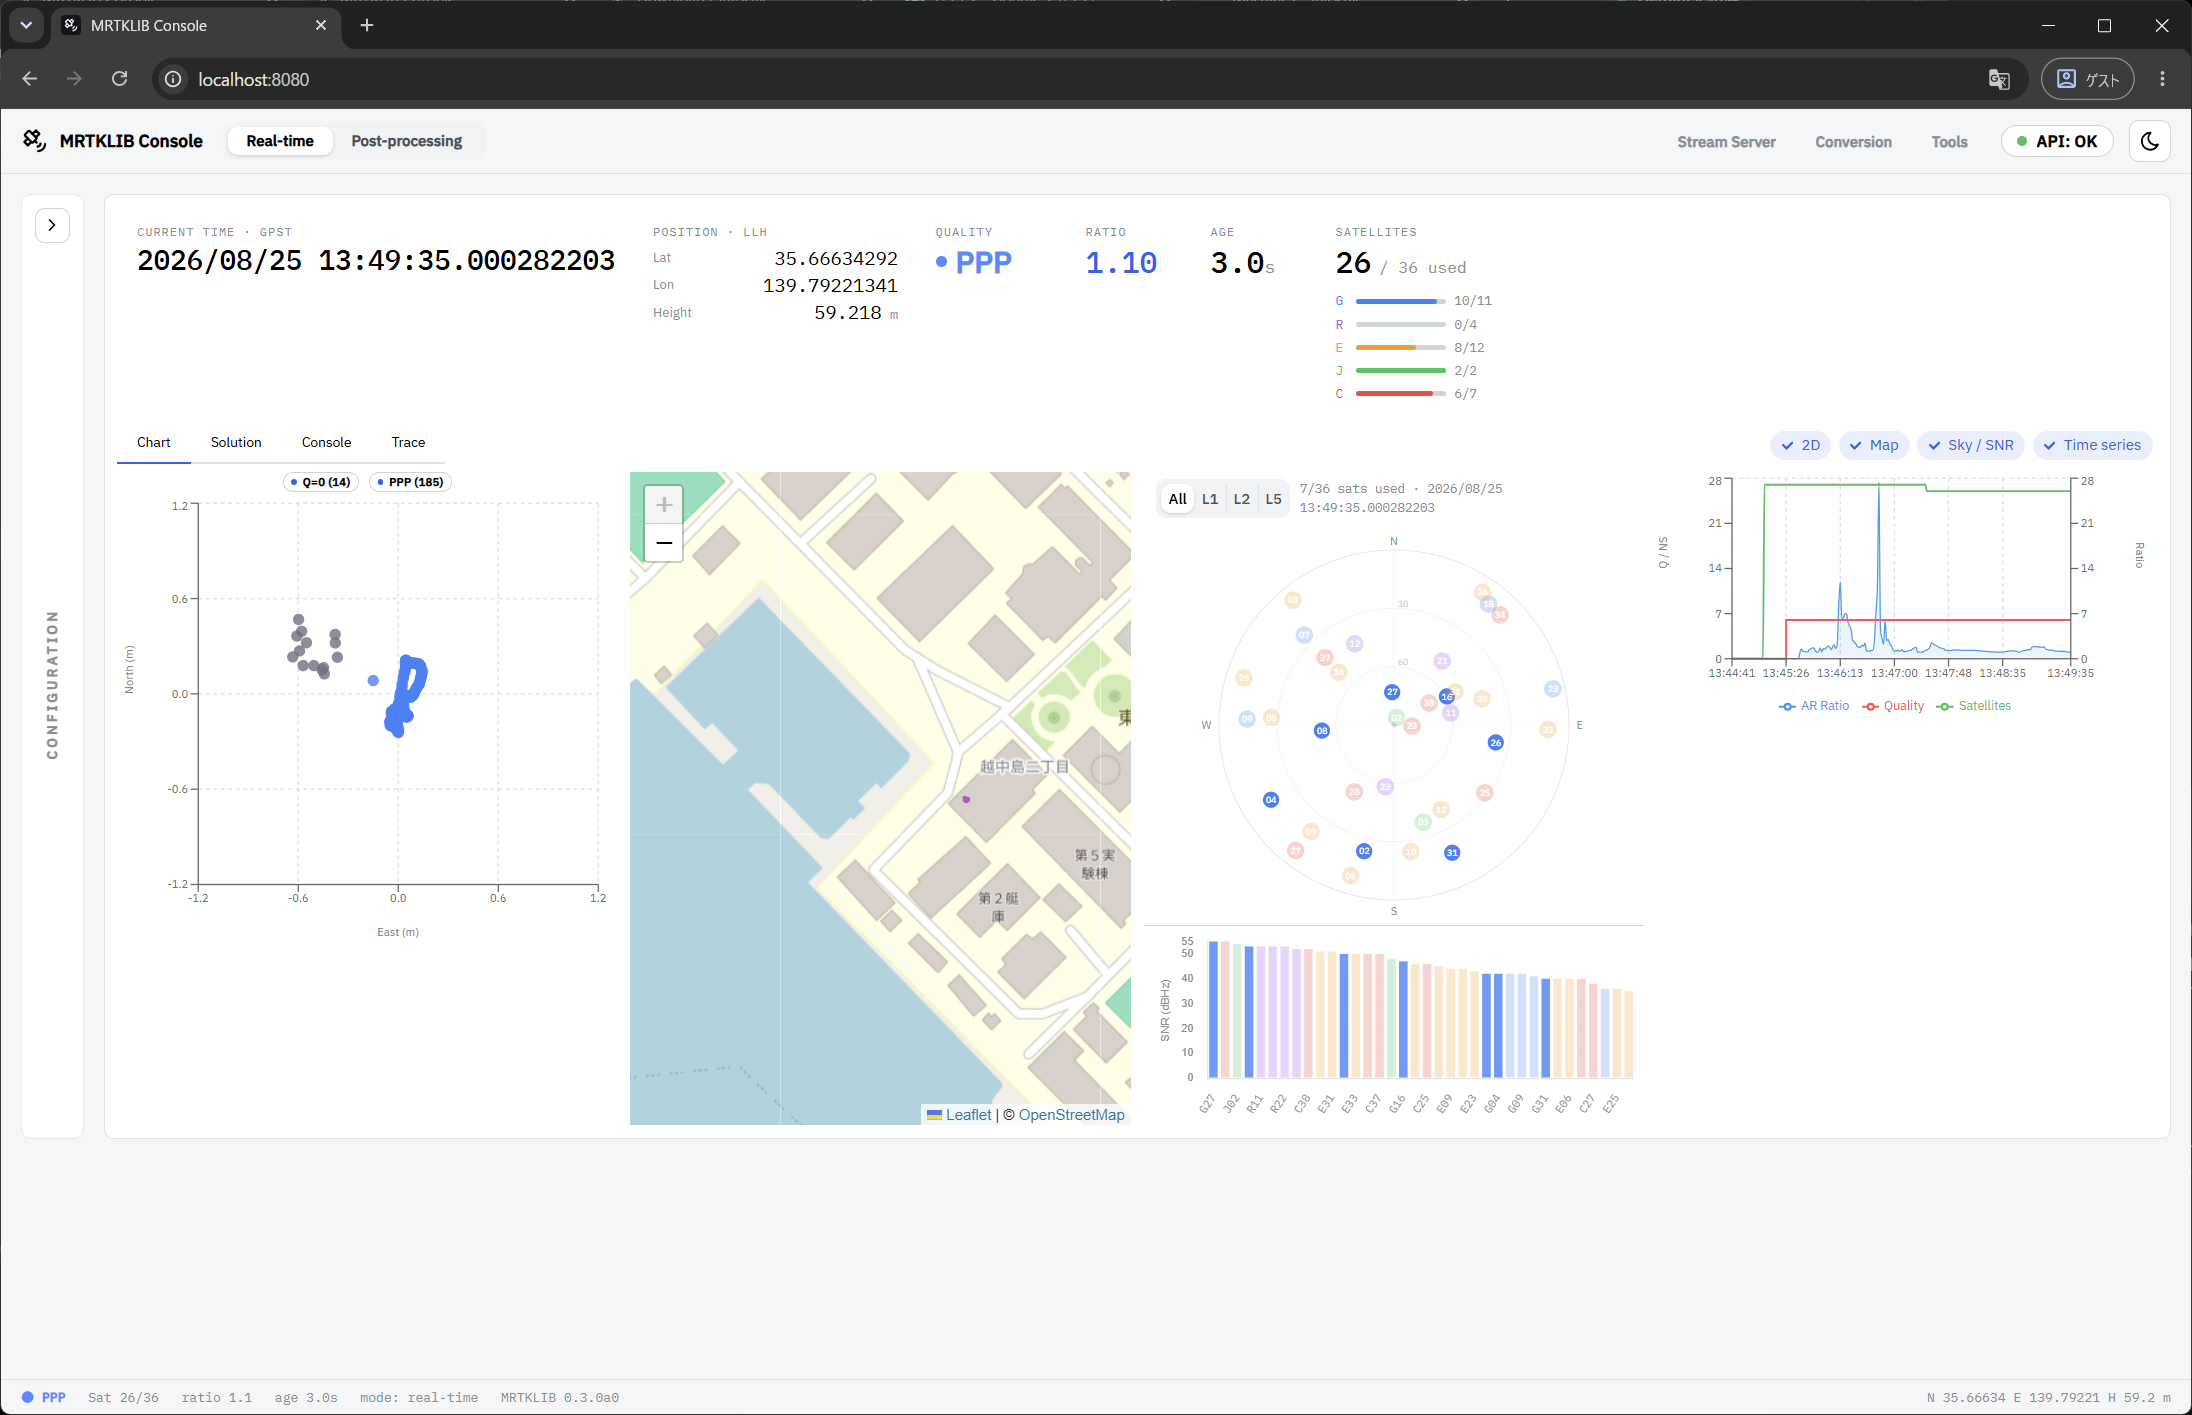
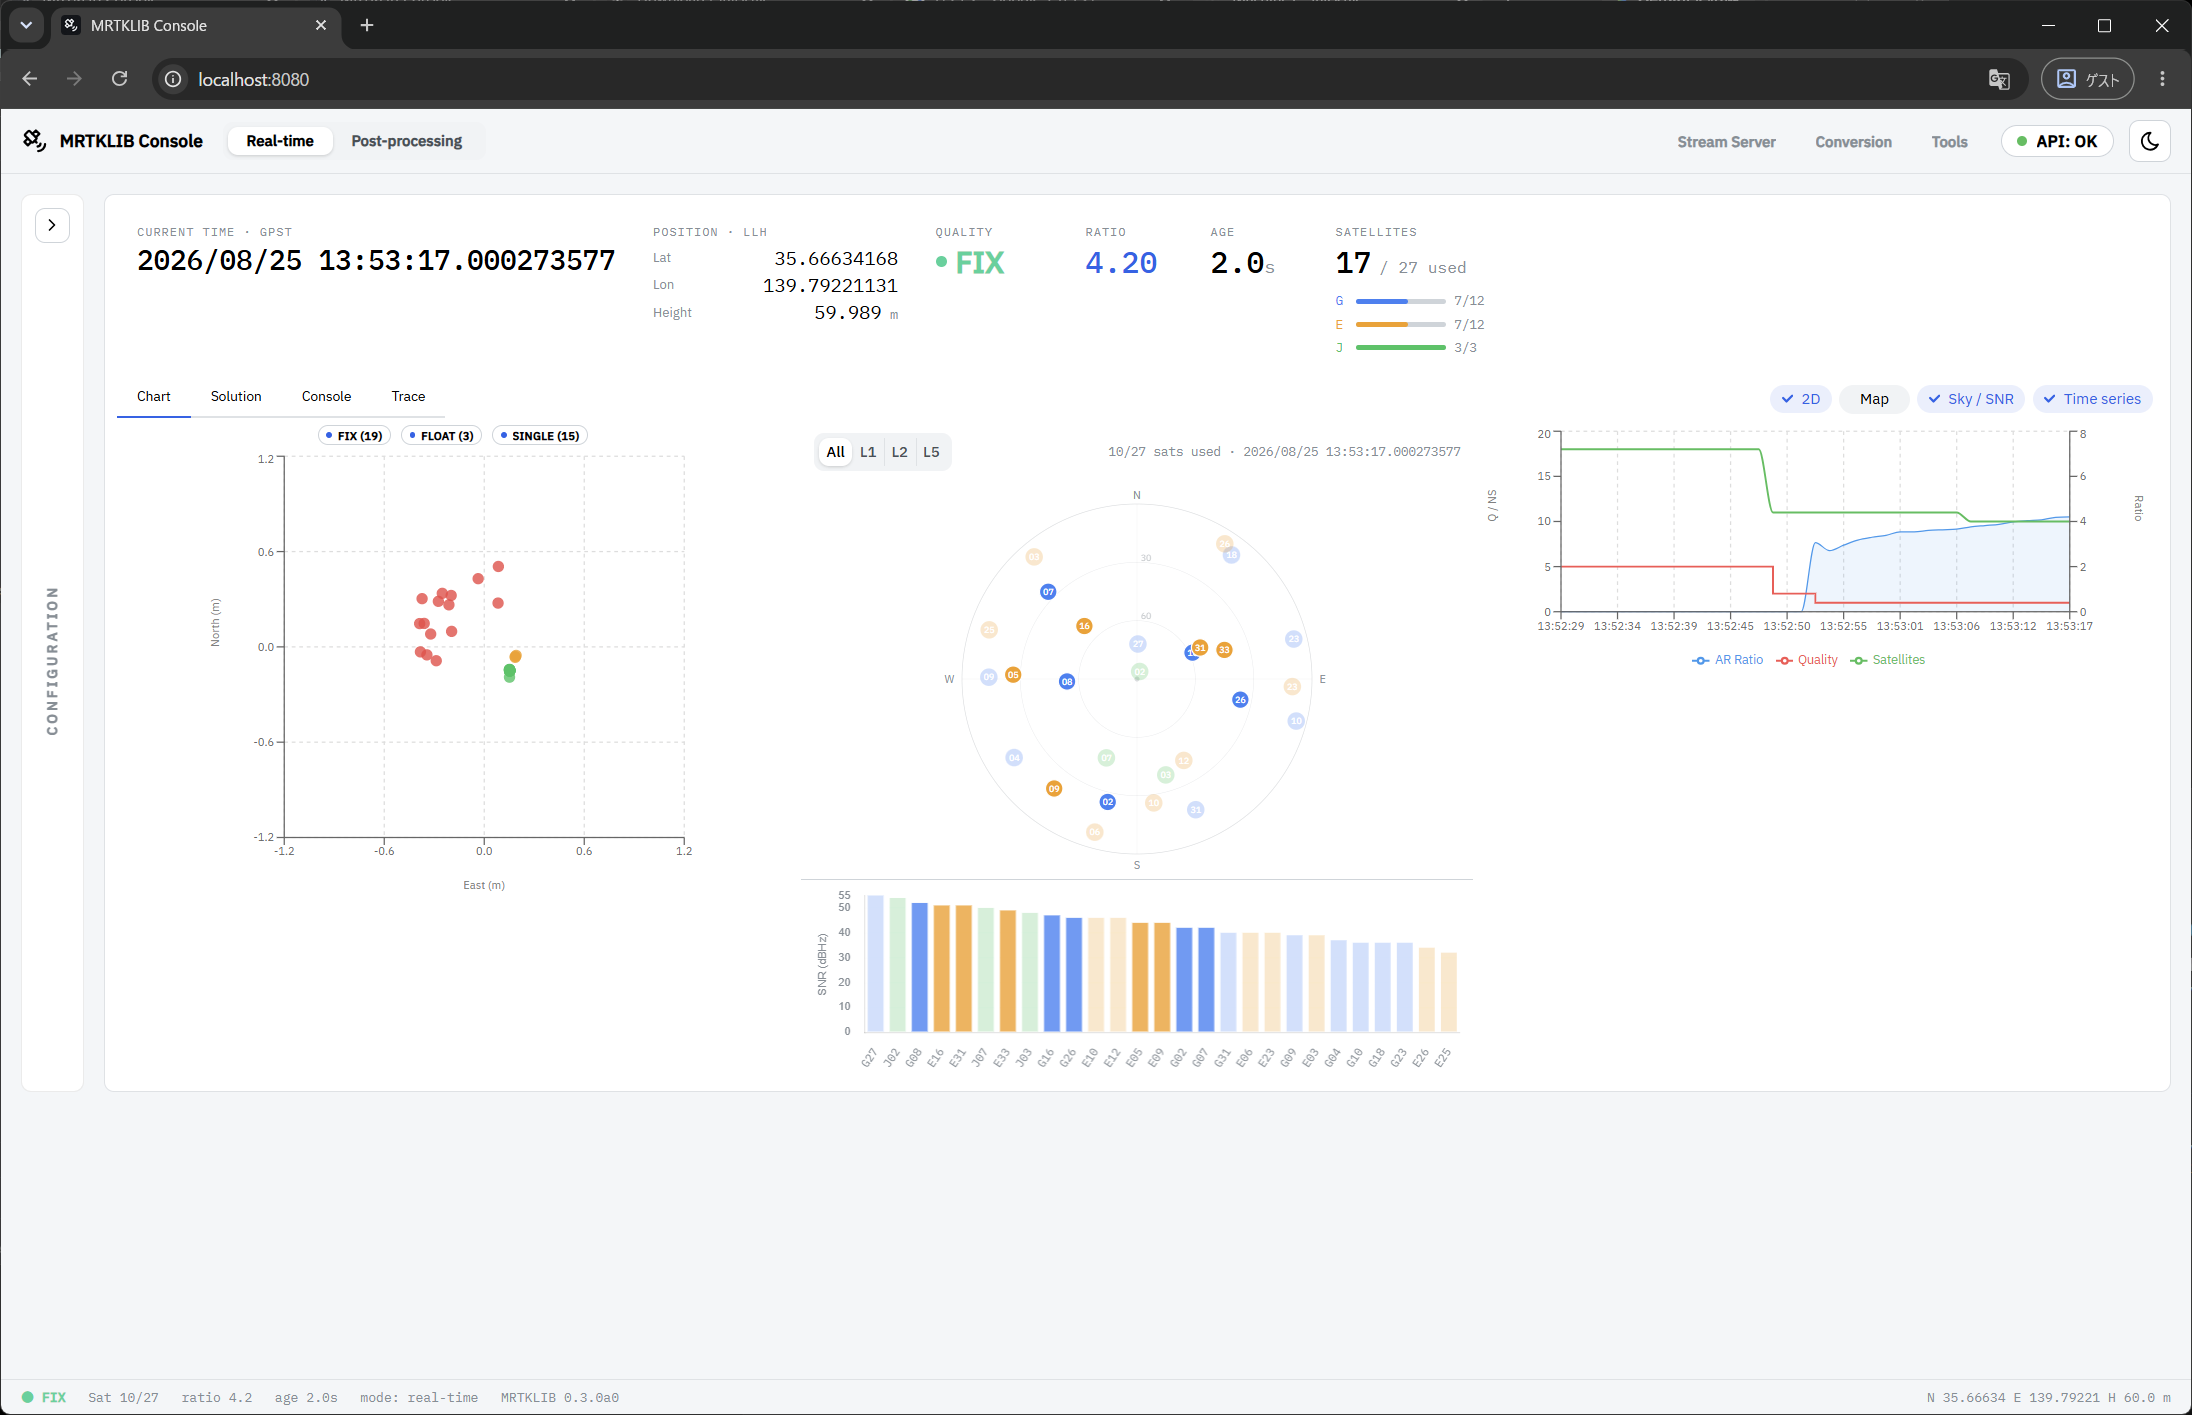
In Chart, you can show or hide 2D / Map / Sky/SNR / Time series by clicking each of them.
Checking the positioning parameters
Click each item under Processing Configuration to check the details of the positioning parameters.
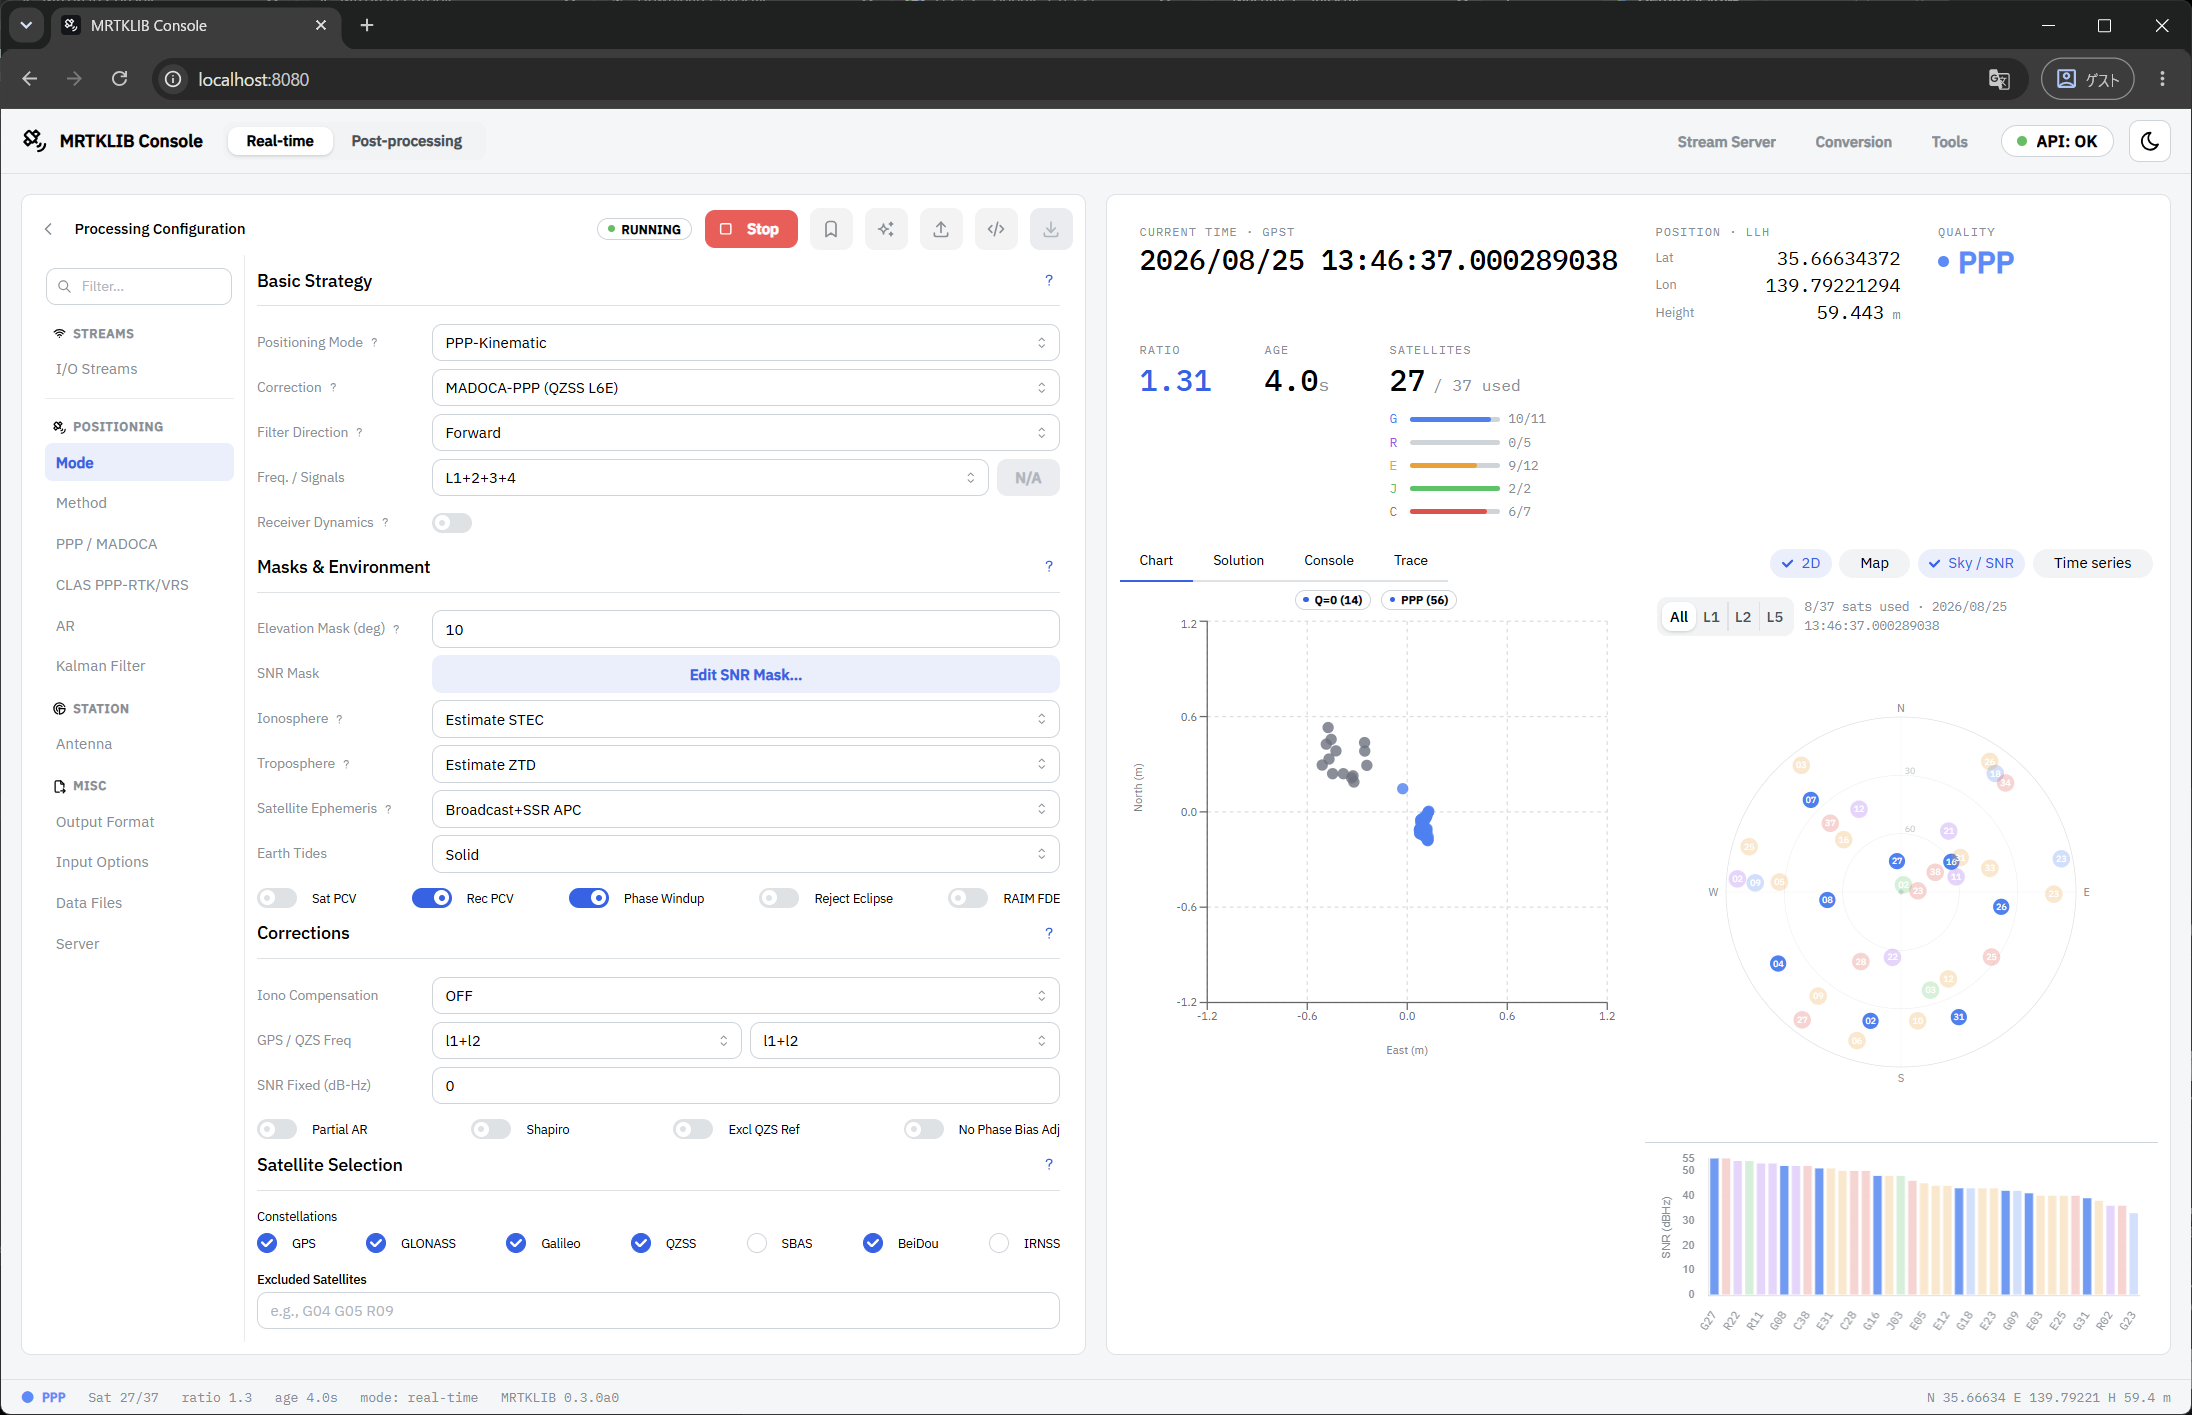
This completes the MADOCA-PPP experience 🎉
When you're finished, follow Shutdown (Windows) to stop the container and detach the USB.
Tip
If you are running this tutorial within Japan, you can also try CLAS (PPP-RTK) positioning by loading the preset labeled QZSS CLAS (BUILT-IN). Try it and see how it differs from MADOCA-PPP.
If you want to learn more, refer to the following links.
- Michibiki Website
- Septentrio mosaic-G5 P6
- MRTKLIB:
- MRTKLIB
- mrtklib-docker-ui
- mrtklib-quickstart
- Zenn (hato.GNSS) (technical articles by the MRTKLIB maintainer)